Sooooo, obviously I haven't been round much in blogland but I have been busy. After a month long vaca from work (I have awesome bennies) I am back at it but I have tons of projects to show from my time off. None of them are cards (tho there are some paper related projects) so feel free to hop off right here if your not interested in general craft stuff (no hurt feelins i promise) and I mean general cause I am all over the place. I had a whole list of projects I wanted to do and am happy to say I got quite a few done.
My main goal was a dresser for my son. He has been using a hand me down, child's dresser, that my daughter had when she was little. I wanted a long, low dresser with lots of drawers that he could put his tv on. It took months but I finally found just what I was looking for at a local thrift shop and at 39.99 I couldn't beat the price. It is solid wood, with dovetail drawers and it was in pretty durn good condition.
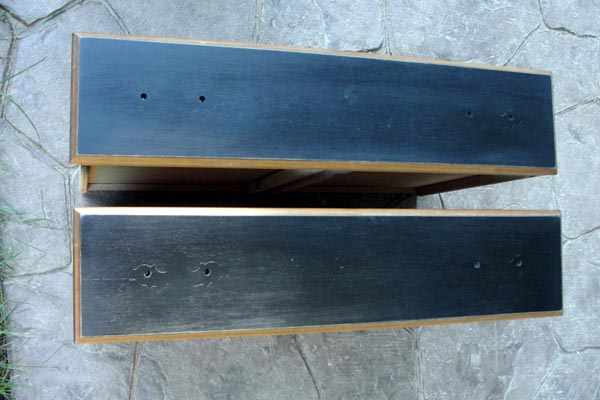
This is what it started out like......
And here is the finished project.....


Love how this turned out and my son is pretty happy too! Look at that smile and the slightly crazy eyes - i think it is from the paint fumes!!!
At any rate, here is a very amateurish tutorial on how I did it and I am by no means saying I did it correctly. I just know it turned out well for us. This was my first time doing something furniture-related and I spent a lot of time on-line pouring over the blogs of some amazingly talented ladies who do this all the time and used a lot of their advice. My main inspiration was
THIS awesome dresser at the
Jilly and Mia blog.
SUPPLIES USED
-Rustoleum painter's touch ultra cover 2X
grey primer and flat black paint
-A spray paint can trigger thingy (a picture is below -this thing is great and helps give a smooth finish)
-Frog brand painters tape (never used this before but I loved how it worked)
-Sandpaper - 200 and 220 grit
-Electric sander
-Tack cloth
-Fiddes and sons wax
-Lots of my son's old undershirts
-Newspaper
-Face mask, Ear guard
-Rubber gloves
I first cleaned everything inside and out with soapy water and let it dry overnight. Then I started sanding. I used a face mask and ear guard just in case. I sanded only the parts I was planning on painting, the front of the drawers and the top of the dresser.
I sanded just until the top shiny layer was gone. I was going to make the rope pulls but my son and I decided to redo the originals and use them. Whew, that meant I didn't have to worry about removing the impression left in the wood.
On to the paint. I wrapped the dresser with newspaper around the bottom and Used a card board box so I wouldn't paint the grass.
Two coats of grey primer first, on both the top of the dresser and fronts of the dresser drawers. Forgot to take a pic of the drawers but I taped around the edges.
Two coats of the black paint came next.
And then I lightly distressed (sanded lightly with 220 grit sandpaper) the edges of both the top and the drawers.
I rubbed on three, individual coats of the Fiddes wax on both the drawers and top, allowing them to dry completely in between. The above picture shows the wax before buffing and after. It is much prettier in person of course.
These are the original pulls. I liked the design but hated the gold metal so I used some
I think I gave them about four very light coats flipping the handle each time to cover everything. I understand you are supposed to sand these things before painting but I was too lazy to do them all and it still worked out ok.
I thought they still looked a little off so I decided to darken them up a bit.
I had no idea how to go about this but I decided to do it the way I do cards and sponged some permanent ink around the edges of the pull. I let it dry and finished off with a coat of matte sealant.
It is amazing what a can of spray paint can do. It fit perfectly in my son's room, looks really great with his decor and he now has plenty of room for his socks and undies. Of course they will still be all over his floor as usual but at least he has a place for them.... theoretically.
I have lots more projects but I have to actually photoshop the pics and organize so I will be posting as time allows. Since school is back in session things are a whirlwind again.
Till next time......
Linky parties


6 comments:
What a great transformation!
I'm loving the 2 tone look! It's different and it turned out great!
PS I have a $50 cash giveaway going on at my blog right now! Come by when you get a chance. :)
Love it! I just redid my daughters old dresser, it's a lot of fun to see the outcome!
love the look of it! so cool and perfect for a boy!
great look the outcome is awesome
FABULOUS transformation...and what a bonus that your little guy loves it too!
Post a Comment